assemble
🪅 Swag
At Assemble, hackers to walk away with a collection of artifacts from the event. These artifacts would be a lasting memory of the special weekend they’d had in San Francisco. We designed our swag to be high quality, and something people would want to keep.
On this page @hugoyhu & @exu3 run through the swag they made for Assemble!
PCB Badges (@hugoyhu)
Last summer, I made a concept PCB ticket design for The Hacker Zephyr - it was never brought to production, but I thought a similar thing for the Assemble badges would be really cool.
Why make PCBs, instead of using plastic or wood? PCBs gave us an easy option for multiple colors, including access to metallic colors (copper coating: HASL, silver; ENIG, gold; OSP, copper/bronze). We could also get several soldermask colors, like matte black, matte green, and several glossy colors. Additionally, PCB production has grown very cost efficient in the past half decade, and I’ve had more experience designing PCBs than plastic or wood items.
We began by creating a design in Figma of our badge:

After creating the PCB in KiCAD, we had several options to order. We could either do Matte Black / Yellow / Silver, or Matte Black / White / Gold. I ordered prototypes of both, but they arrived too late. Sam made the decision to order the former, and we placed a production order before the prototypes arrived. The production run arrived at Figma HQ on 8/3- phew!
To personalize the badges, I used my thermal label printer and printed 1.5x0.5” labels with names using a Python script to generate 1.5x0.5 PDFs. I enlisted the help of Celeste & Lexi to attach lanyards to the PCBs as well as getting Sarthak & Holly’s help sticking labels on and sorting the badges.

Postcards (@hugoyhu)
Postcards were a more last-minute thing. I originally floated the idea of bringing some vintage postcards to Assemble - I’ve been recently adding said cards into sticker boxes and some envelopes, with handwritten messages. I thought that we could establish a mail station where you could mail yourself a card, from Figma in SF!
However, in Sam’s infinite wisdom, he proposed making custom postcards! We decided to go with 5 designs, and ordered 250 from moo. We made the back of the postcards a space for Hack Clubbers to sign each other’s postcards.

Whilst we were originally going to mail everyone’s postcards back to them, most people ended up taking their cards home themselves! That said, the postcards left everyone with a personalised artifact from the event and were a wonderful addition.

Instax Photos (@hugoyhu)
We brought a FujiFilm Instax Camera all the way from Vermont to San Francisco with more than 200 packs of film! I went around, as the photographer, taking images of people & getting them printed. When I returned home, I sorted through the images and mailed them out to everyone.

Sticker Mule (@hugoyhu)
We placed a HUGE swag order with Sticker Mule. Somehow, we spent $2,710.74 in one order of swag. Most of that was spent on T-Shirts. We originally considered getting them from Hack Shop’s print provider, but they couldn’t give us a definitive delivery date. Additionally, other providers like Custom Ink were difficult to work with, at best. We decided to go with Sticker Mule, and despite it costing a lot more, we knew the stuff would arrive ahead of schedule and would be of high quality.
Sam had two amazing designs: an outline map of SF streets on black, as well as an oil painting-like portrait by Max, which we used for the final design. We had time to order samples, but we had the image printed too large. Several digital proofs later, 200 shirts(ish) ordered!


(Ian & Caleb, from the Assemble team, modelling the t-shirt in front of the real Golden Gate Bridge!)

(The final proof from Sticker Mule of our t-shirt design.)
We also ordered a hack-ton of stickers. We had two designs: the Assemble logo (2”x2” with rounded corners), as well as an Orpheus shouting “Hackers, Assemble!”. We got pins, too! Small metal pins with 3 different Orpheus drawings. Also from Sticker Mule, but not placed in this Assemble order, were a large number of Hack Club stickers. (We ship these to hackathons around the world, get in touch!)

Keychains (@exu3)

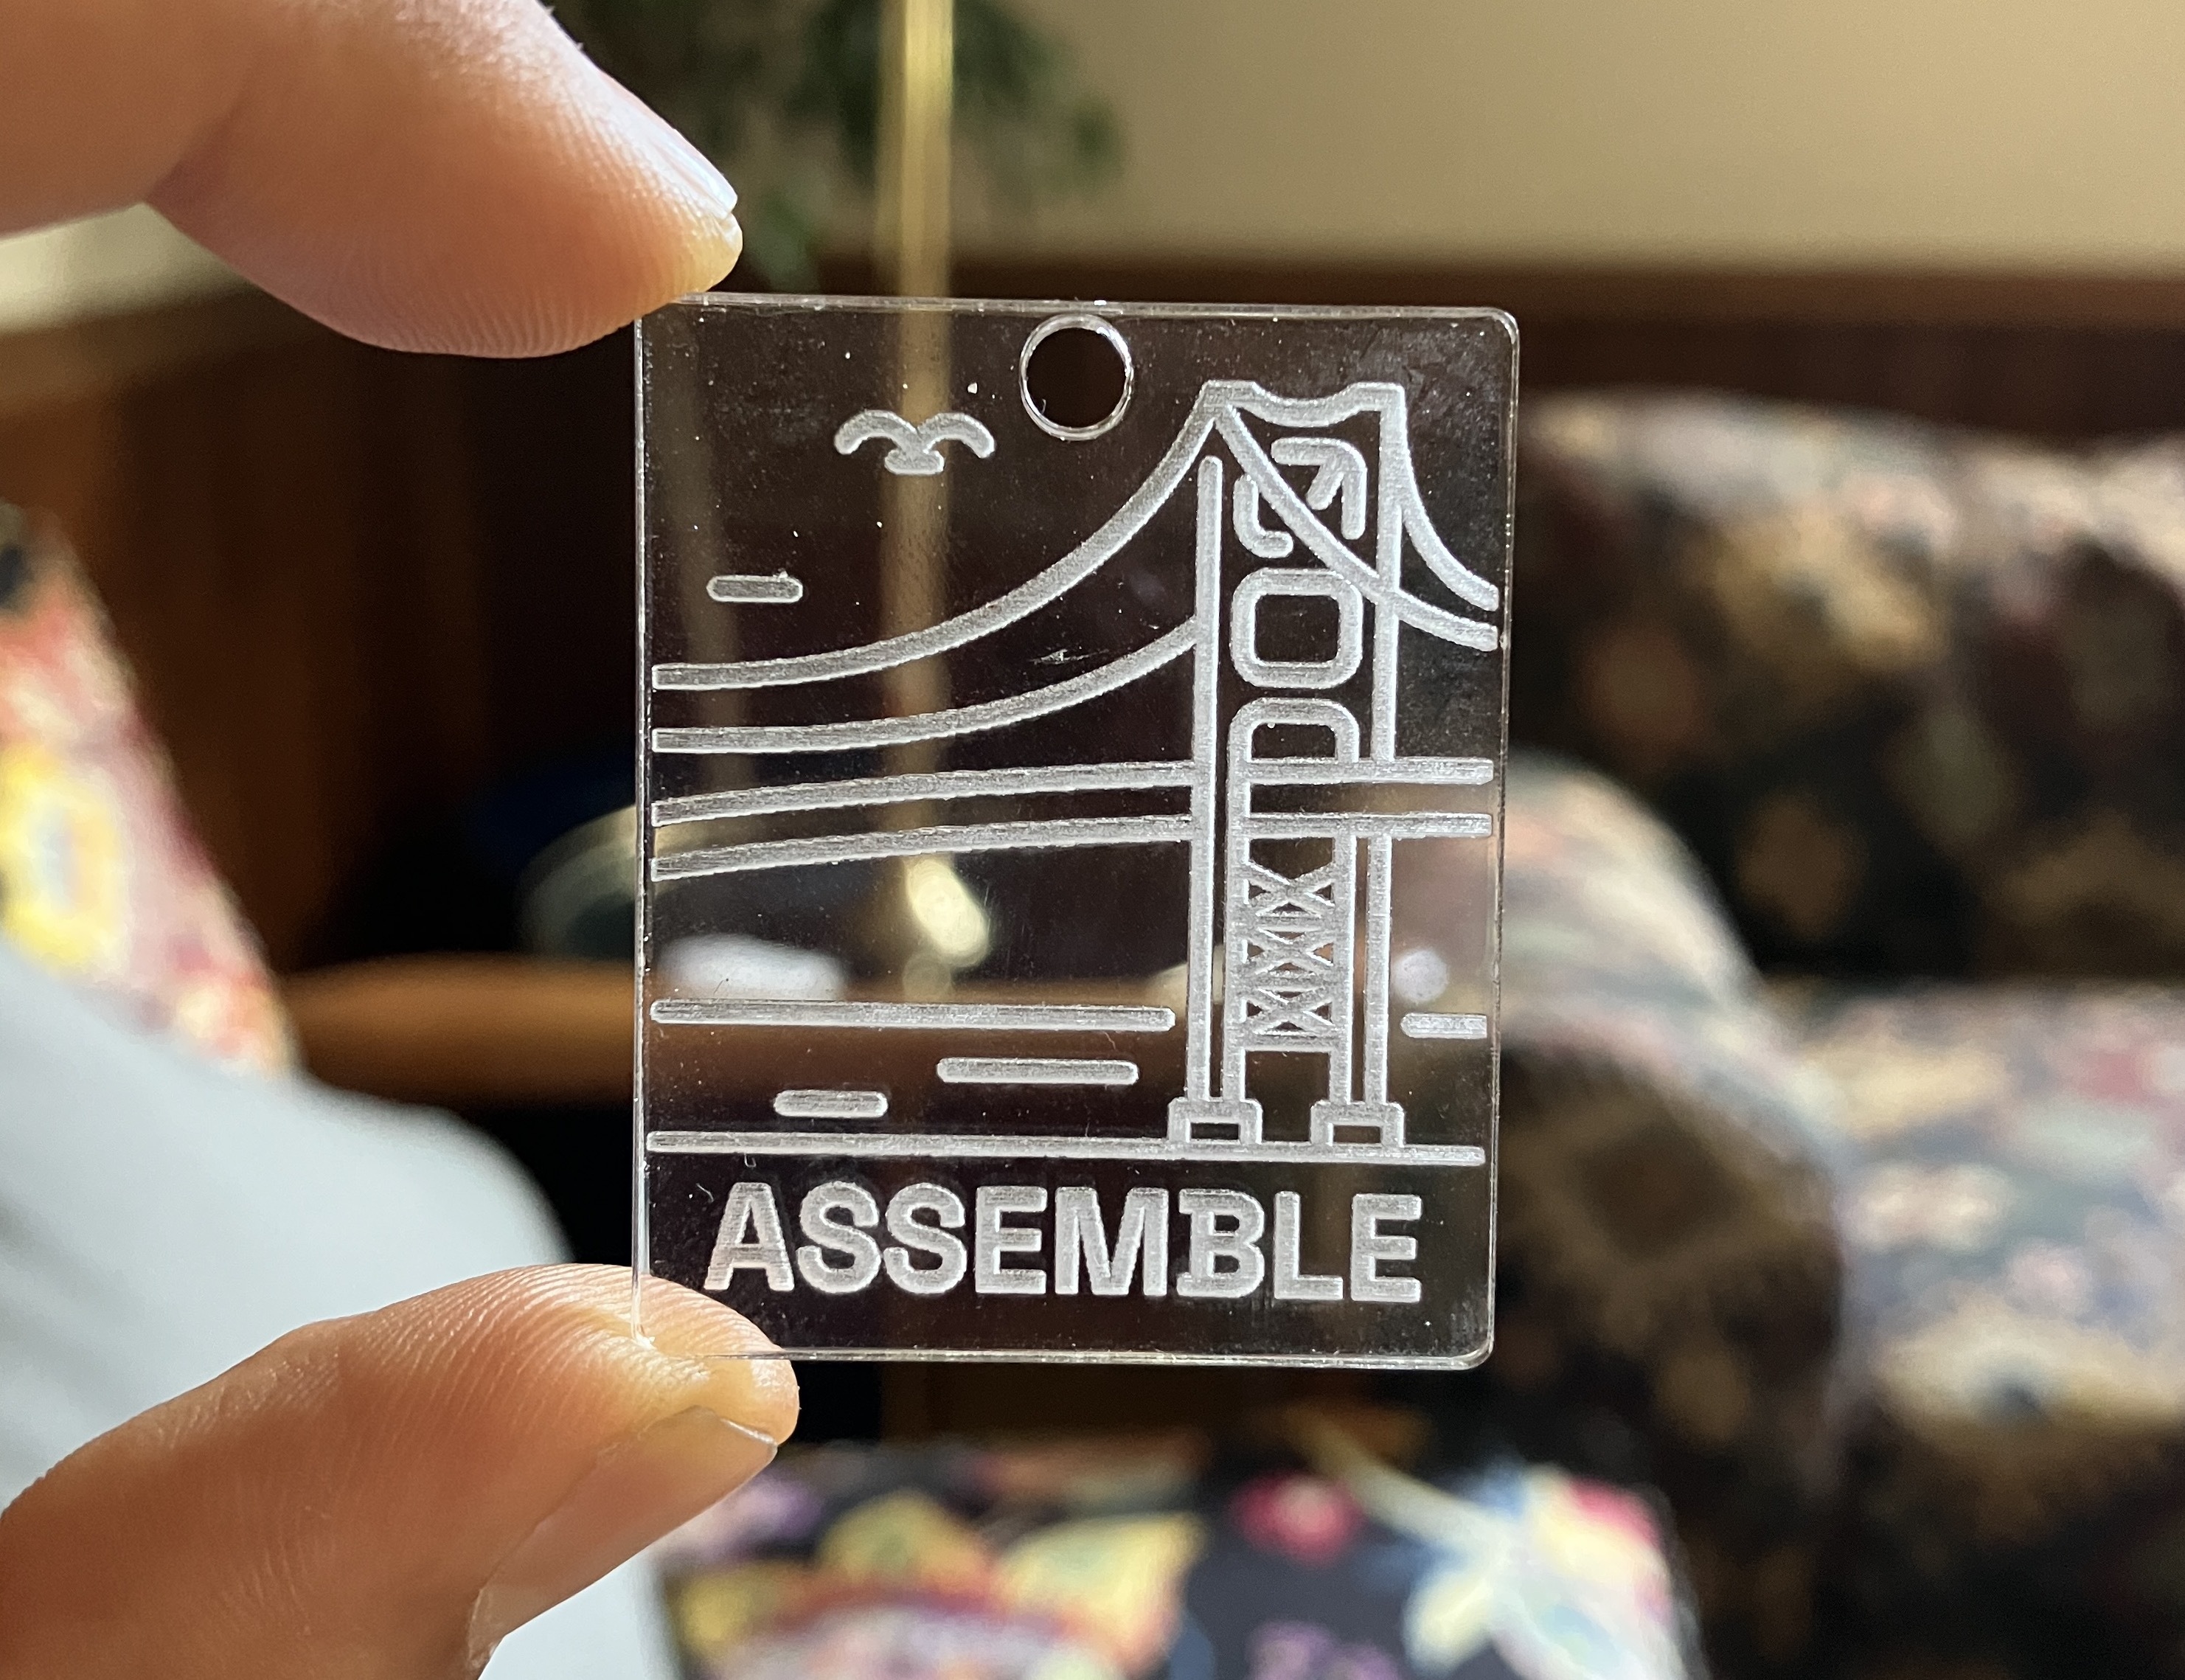
For Assemble, I custom-made keychains for attendees to take home as mementos. To make about 170 keychains, I used the following materials:
- 1 sheet of 2mm-thick acrylic (18” x 24”)
- Keychain rings
I had access to a laser cutter at the local makerspace in Vermont which we used to cut and engrave the keychains. The total time in the laser cutter for the 18” x 24” sheet was about 60 minutes, and we ended up with about 170 pieces.
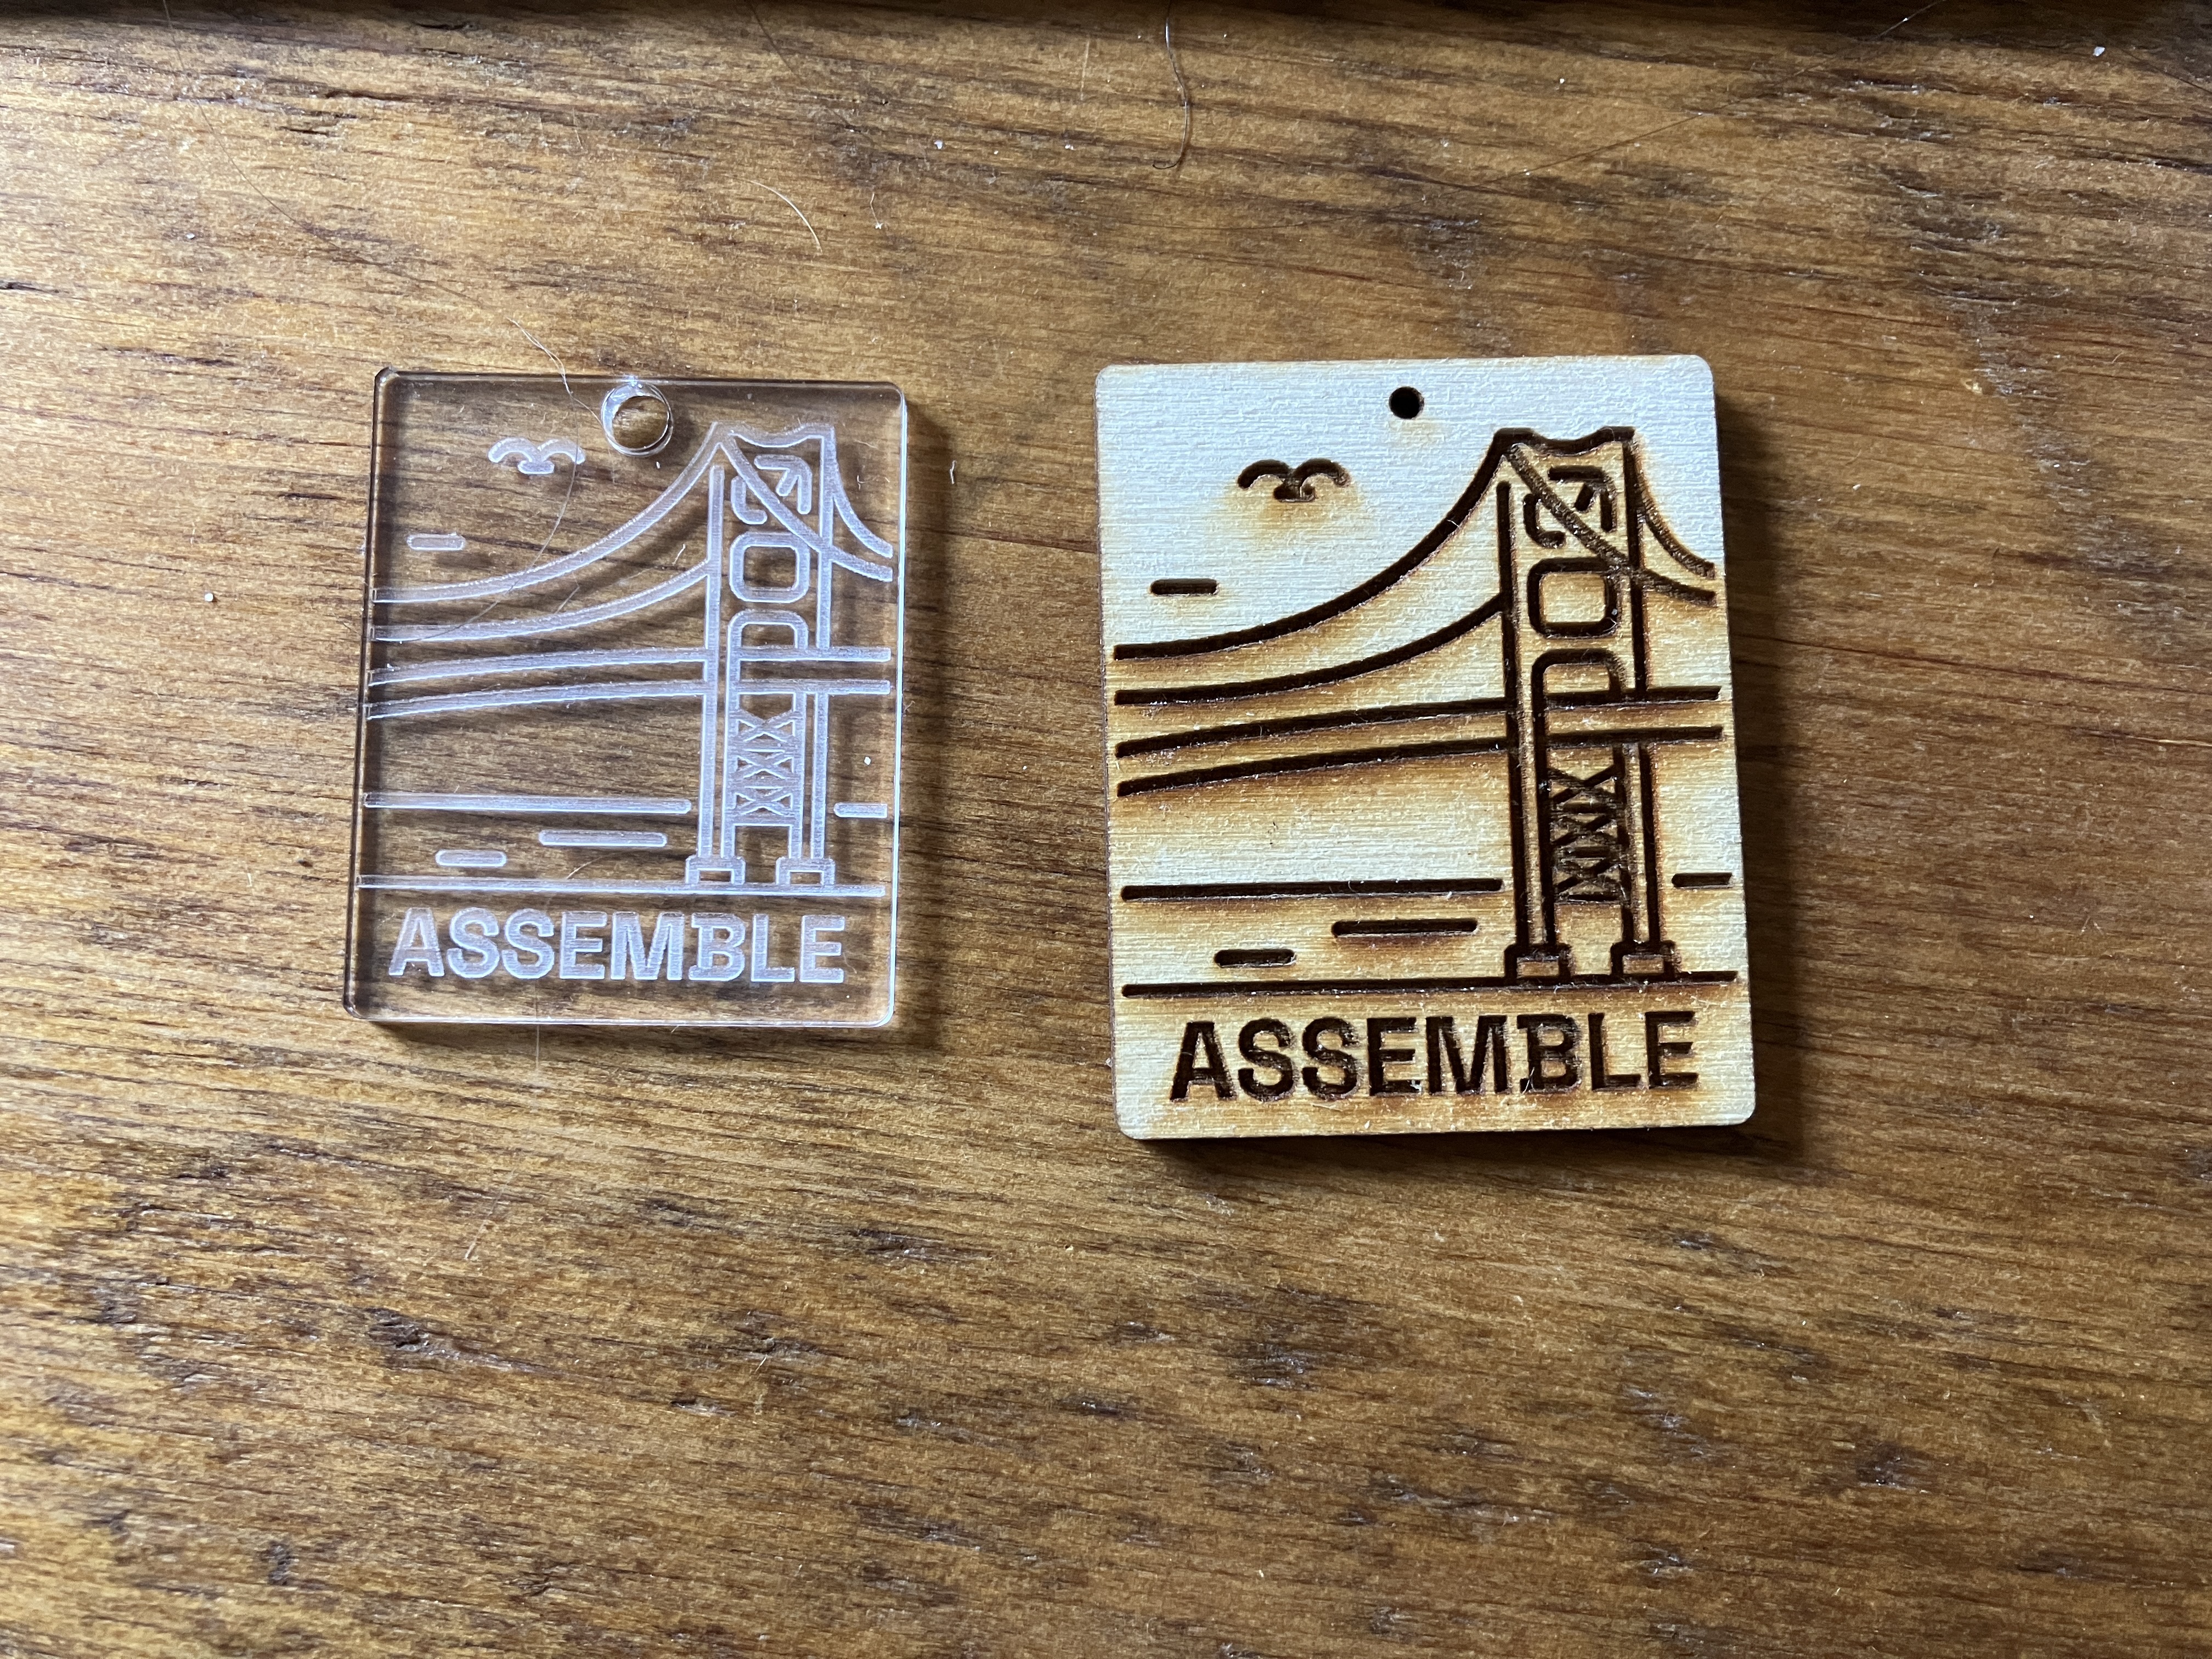
Our earlier prototypes were made with scrapwood, but we ended up going with the acrylic instead because it was difficult to source the type of thin wood sheets we would have needed.
 Acrylic keychain on the left, wood keychain on the right.
One flaw with our keychain design was that the hole at the top was too close to the edge which compromised the durability of the keychain. The hole being close to the top made it easy to put the rings on, but it also made it easier to break.